- Working Hours : Mon - Fri: 9:00 Am - 06:00 Pm

Resin bound driveways are common due to their aesthetic appeal, greater functionality and design flexibility. But laying these designs is an art that requires skills, best-quality materials, equipment and a professional approach to get your desired results. In this blog, we will discuss all these aspects:
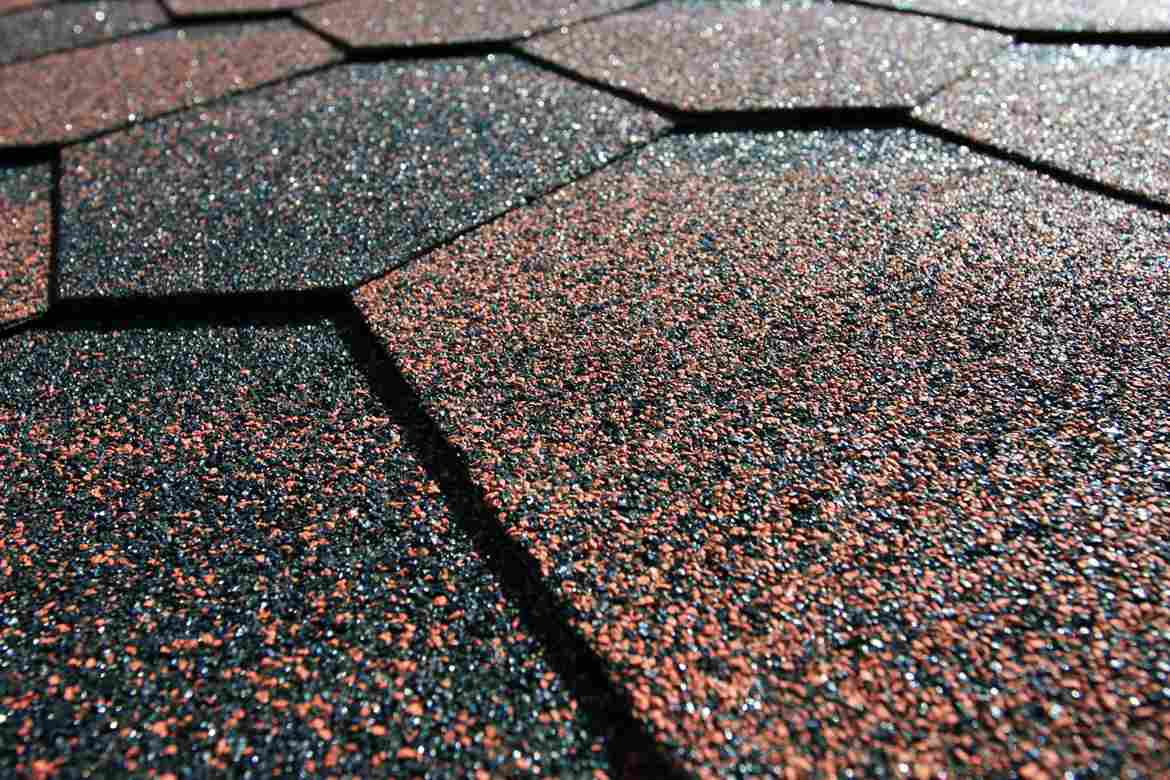
A resin bound driveway is a hardened mixture of resin and aggregates, trowelled professionally to give a smooth surface. It is also known as a stone carpet.
Similar to their appearance, resin bound driveways have versatility in their uses as well. They can be preferably used for:
Below is the detail of the material and equipment needed for the resin bound driveway:
Resin: Opt for a UV-resistant and the best quality resin that will not discolour and last longer.
Dried Aggregates: Along with the resin, aggregates are the other important component for the driveway. They affect the look as well as the strength of the driveway. So, choose the one that matches your needs.
Forced Action Mixer: Arrange a suitable mixer which can accommodate a reasonable quantity and wind up your work on time.
Other equipment you may need includes a forced action pan mixer, power supply, whisk paddle, resin trowel, gaffer tape, buckets, cleaning rags, clean shovel, stiff brush, latex gloves, wooden lute, etc. Check before moving further that you have all the essential equipment, whether it’s technical safety or non-technical equipment.
Before moving on the installation of resin bound driveway, there are some initial checks and preparations that you must ensure so that you end up with the best results:
Surface Checks: Make sure that the substrate surface is clean and dry.
Rain: Do not move on with your process if there are chances of rain.
Surface Moisture: Checking surface moisture is very important before laying the driveway. Use a hygrometer to know to know the moisture level. If it is above 80%, delay your project.
Temperature: The surface that needs to be paved must have a temperature above 3 Degrees Celsius.
Material and Equipment: Make sure you have all the required materials and equipment for the driveway.
Edging Tape: Ensure that the boundaries of the work area are secured with the tape to eliminate the chances of resin staining.
You must have a stable base so that it is appropriate to bear the load. Suitable resin bound bases include:
Extreme care is needed to prepare various batches of resin for paving so that you get your desired strength and colour.
Mixing all the materials is a step-wise procedure:
It varies based on your need and the quality of strength you need. For an accurate estimate, consult with the professionals. You can also calculate the required amount online via an authentic calculator.
A resin bound driveway is a mixture of resin and aggregates that are spread evenly to give a smooth finish. This driveway is permeable and gives a modern look.
For a resin bonded driveway, the resin is spread on the substrate, followed by spreading the aggregates that stick to the resin. The resin bonded driveway is not permeable. It is not very smooth and gives a historical look.
Generally, it takes 8 hours to cure; however, for speedy curing, you can use the accelerator if the temperature is below 15 degrees Celsius, or curing is required overnight.
As the renowned driveway experts in the UK, we have a crew of skilful professionals and specialists dedicated to creating the driveway of your vision using robust surfacing materials.
Complete coverage throughout the whole of West Yorkshire
Copyright© 2024 | 1st Choice Driveways & Surfacing | All rights reserved.